Ouch. I hate that faction almost as much as the Warrens. Congrats.
5 Likes
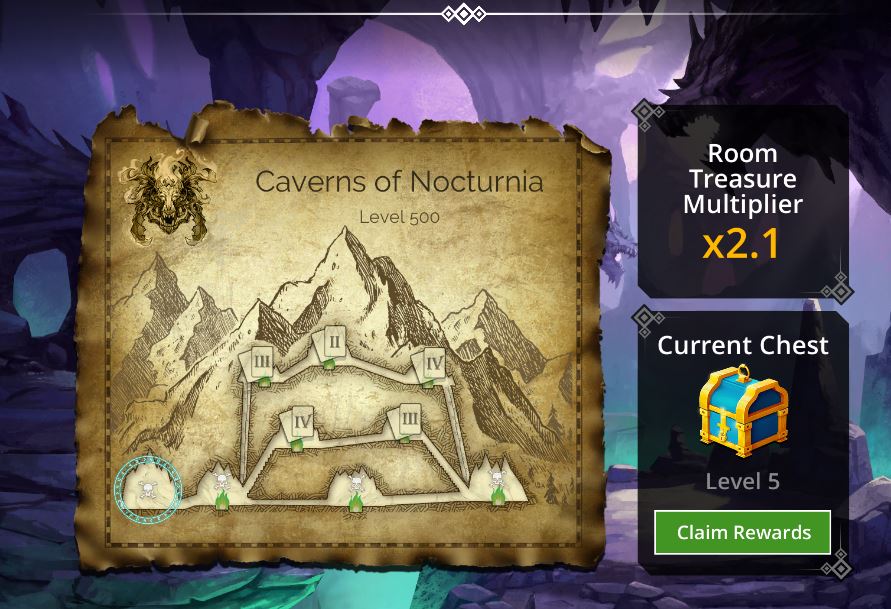
Fell Roost
level 110 hoard 200 50 % no potions
Nocturnia
Fell Dragon Egg
Nocturnia
Fell Dragon
Fell roost banner
Straight Forward no problems
1 Like
Gotta love the faction tier shop. The only tier buy in troops are “epic”, ie fell dragon lol. No chance of saving a few chaos shards trying to max the faction troops via portals. Maybe that’s why players are saying it seems a bit more costly than usual. Very shrewd. I’ve got a bucket full of FDs lol.
Oh my lord. And I complained about 40 minutes.
3 Likes
Congratz!!! 5 hours of battle looking at every move like a GW battle ![]() you deserve a achievement, or probably a unique title (What a concentration).
you deserve a achievement, or probably a unique title (What a concentration). ![]()
![]()
![]()
Btw congratz for your records and great tips
Got it memorized
3 Likes
Late to the party, just leaving it for archival purposes if anyone is doing Fell Roost on another day.
Beat 300 without potions, beat 500 with potions first try (4 Tier 7). 199 hoard, 3 nysha medals, 50% faction bonus.
Team:
Undead Drake
Nocturnia
Fell Dragon Egg
Nocturnia
Silver Banner (+2 Purple, +1 Brown, -1 Blue)
Went with this banner at 500 instead of the faction banner because you spend way more time filling Nocturnia than anything else. The other Brown/Purple banner gives a -1 to Yellow, which effects 2 troops instead of 1 for Blue. +2 Yellow/+1 Purple/-1 Green doesn’t do much once your yellow troops are full.
The only thing I can really say is that it really doesn’t matter what you have in the first slot, its very likely to die anyways due to lack of skull reduction. I don’t have a Nocturnia up there because I don’t want to half charge a Nocturnia and watch it die. Undead Drake gives me a few more stat points for room 1, doesn’t color block Nocturnia, and can speed up killing something with the skull storm. (don’t get too attached to it).
You can easily do Nocturnia, Nocturnia, Fell Dragon Egg, Nocturnia as well though.
Made 3 attempts at 500 with no potions, got to the boss room once, but had my Fell Dragon Egg turned into a Giant Toad. Had one fail because Queen Grapplepot demolished my team while it had 12 hp remaining. The other loss came in the Scurvy Seadog room after Glaycion/Snow Guardian variant poked the stuffing out of me and left me near dead for the 3rd battle. I couldn’t really clutch out the battle with 2 Fell Dragons.
I think its possible without potions, just need the skull skyfalls to be a little nicer to me. It doesn’t feel like I do enough damage though, even with 3 Nyshas.
PS. Don’t rely on Nocturnia to summon
9 Likes
Potionless Hoard 111 + 50% bonus. First attempt (trying hard not to brag).
Due to sky skulls missed taking a screenshot before landing that last fatal blow.
The team was, as you mention earlier, Undead Drake/2x Nocturnia/ Fell Dragon Egg with Silver Necropolis banner and 3x Nysha.
Middle rooms were Drowned Grotto & Dead Pirate’s Booty.
Boss room - about 15 minutes; entered with empty/Undead Drake/Fell Dragon/Nocturnia. Drake died, Nocturnia chanced to summon Fell Egg twice, I let the first one die and then used the second Fell Egg to repeatedly resummon top slot.
Another tip - pay extra attention to brown gems in boss room (similar to how one prioritizes yellow in Silver Necropolis to stall enemy Vanya) because their Nocturnia is constantly blocked on purple.
Also - I chose to sacrifice part of splash damage by targeting enemy Nocturnia (the sooner she dies the better of you, I suppose).
Only cast your Undead Drake if no other alternatives exist - I don’t feel summoning a bonestorm is particularly smart thing to do.
9 Likes
I am approaching 500 with horde 100 tier 7 x 4. I’ve done 300 without drama so I am fairly optimistic that 100 horde is enough. One question…the faction can be completed with an overall score in the region of 1.5M so why do ppl carry on. Xbox LB is at 10M. LMAO.
My answers would all be flagged …
2 Likes
Yh man. 1.5 M is an irrelevant number because we only care about getting the latest delve out of the way. This is certainly not a no potion delve but 10M is ludicrous esp cos those who do it already have zuul. Serious psychological issues here. In fact… china’s top player has just quit because of gaming disorder.
Fell Roost PF 500 with 7 Tier 7
Hoard 100 with 50% bonus
3x Nysha
")
1 Like
Thats it guys (without potions)!!! Sub 200 aswell ![]()
 - Fellroost (1)")
4 Likes
Beat 500 with no potions as well, 2nd try today. got skull stormed in the boss room on my 1st try.
2nd room was
Pyggra
Pyggra
Lord Ember
Sheggra
Pyggra respawns were annoying, but not enough to do much outside of killing my first slot a lot.
3rd room was Fey Cap, Giant Toadstool, Florian, Glitterclaw. Glitterclaw managed to snipe out my Fell Dragon Egg which was really annoying. Went into the boss fight with a sub-average team.
Boss room, I tried a “new” strategy. I focused on the enemy Undead Drake first, because the last few runs, the skull storm + high enemy attack was causing me to lose badly.
Yeah, its not the Fell Dragon Egg or enemy Nocturnia, but it worked out amazingly well. Why? because Fell Dragon Egg summons in a wussy replacement in slot 1. No more painful skull hits and if the enemy summons another Nocturnia, the actual strong one gets mana blocked. The weak summon Nocturnia only hits for 42 true heavy splash damage.
Eventually after forever, I beat it. my Nocturnia summoned an egg in the first slot which died near the end of battle. 2nd and 3rd slot were 2 Fell Dragons which wasn’t ideal, and 4th slot was my last Nocturnia which got beat up pretty heavily by their Nocturnia and Fell Dragon, but survived with enough hp/armor. sub 30 armor and sub 20 life.
People have done it with lower stats, but at least I can say I did it?
6 Likes
Great to see you guys doing potion less 500. I won’t be trying it lol. Glad it’s over and done with but not too bad if the middle rooms are kind. Took 4 goes in the end because of the mid rooms but can’t complain. @TheIdleOne team horde 100. Better start playing catch up with GW before i get kicked lol.
1 Like
Finally did potionless Sunken Fleet, started it around time of last new delve event, stopping to do that potionless first, then resuming.
We have a guild thing where we often do a sort of groan at the RNG and then hope it changes fortune, well it did today. Thanks to guildees (they know who they are) who helped me see a move in a sea of traps!
Firstly, I cannot count the number of times Water Elemental died to Drowned Sailor Deathmark - I ended up having to run Orpheus medals just to survive. Yesterday it scuppered a run with 2 Orpheus medals with a first chance death mark, with 0 gems converted. If I had to guess, that thing screwed over at least 18-20 runs. I reckon about 50% of the time without any gems converted. It is extremely frustrating to say the least that something with circa 20-25% chance usually death marks so often. Obviously around a 100 battles of a sample size, and it cast at least 50% of the time in this delve for me.
Secondly, getting 2 TMQs through the rooms is tough. The rooms are purposefully designed to counter the Sunken Fleet team. Coral Golem is obtuse, so you can’t drop Water E. If Water E dies, in first room to deathmark, expect pain. Merlion is very easy to fill, but by far and away the worst troop is Sea Witch, heals everyone, puts on a random enrage to someone. What that does is make TMQ 1 shottable with skulls usually.
So, a team predicated on skull damage and alignment, is really up against it. It also heals troops out of range. if you can’t align you are screwed, as the loops almost always bring skulls with them, especially as it is capable of looping over and over.
Crabman got loaded when there was no troops with stoneskin up front middle of last week. So a couple of times I went Crabman, 2 x TMQ and Sailor, but ended up being a mana collection problem, so ditched it this weekend.
Thirdly you do have some counters, curse when using TMQ, stun with Water E and Deathmark with Sailor. It is therefore possible with good fortune to kill even impervious Merlion with dm, if curse lands. Merlion is really nasty, 276 damage if you are silenced.
Started out - out of room 1 - typical team;
TMQ
TMQ
Water E
Drowned Sailor
3 MOS medals - Hoard 211 (spent nigh 3 weeks of a month sub 170, but just no luck) Banner 2 Blue, 1 Red -1 brown.
So today, first go, lost TMQ to Sea Witch Enrage, then second, cast after, got out of second room, but only back two left. Died early vs Merlion and Co.
Second go cast my Sailor, took all yellow, matched and filled Water E. AI casts first Sailor, no yellow converted, Water E deathmarked (flat 20% chance). Cast Water E, pass turn, AI moves, Water E dies first chance it can. That attempt actually got me to the boss room with TMQ and Sailor, but they died early.
Final go.
Started out - out of room 1 - typical team;
Next opponent is Tier IV - Coral Golem, Nyx, Mososaurus, Vodyanoi. Got out intact, Vodyanoi cast on sailor, killed all with skulls. Dropped both Orpheus medals before fight to MOS.
3rd room - Tier V, Coral Golem, Sea Witch, Sea Troll, Nimue
Nasty, Sea Witch. Kill Coral Golem, then a loong battle ensues. Sea Troll to Death mark, but at this point my top TMQ is nearly dead. Sea Witch and Nimue, kept filling Sailor and just throwing it out there, in the end I kill Witch with skulls and then get into Nimue. Right at end I take all yellow with Sailor when Nimue is full, it casts, leaves me a load of skulls but both TMQs silenced… In the end lose top TMQ to skulls last hit.
Final room
1 TMQ, Water E and Sailor
Started onimously - matched a few, did some skull damage with a TMQ cast

Water E death marked early as almost always and I took orpheus medals off. It cleansed…
So, the groan worked, as first Water E died to a death mark from a +19 blue conversion. I skulled down Crab man and they killed TMQ next turn. Sailor died to Death mark 3 turns later. Now I was really totally reckless until here, I abandoned casting on alignment and tbh it must have worked to a point. Once Sailor died, I started being more cautious, the key is get rid of green so AI TMQ casts and doesn’t match.
AI TMQ - I kept shifting green or casting TMQ and eventually my TMQ dies to skyfall skulls. I then can force AI TMQ to cast and not match any green, but leaves this…

With the aid of guildees - we spot a match to a match to a match in the fog… See if you can see it ![]()


Can see the way now… the greedy thing will take the vertical reds to the right, hopefully be short and I can stun it to within a skull hit.

And so it does… and a lucky skull falls behind the other…


Back to 5 to do, the latest seems reasonable. Treasure situation dire, but will get some back with the event and finishing two normal to 500. Next target will be Fell Roost, and then more nightmares to follow! ![]()
16 Likes
Nice. I won’t follow your lead tho. These high horde values are not for me. Gold is too precious these days.
1 Like
That was a great win, congrats! Did you take the horizontal brown+purple at the bottom center, leading to a horizontal 4-red and two skull matches?
3 Likes
Thanks!
Yes, correct. ![]()
I looked at it several times and thought it’s going to end up causing a doomskull to leave matches, or just leave lots of red, but then you can see it will make 6 red, skull hit with the 2nd far most right Doomskull with those level with AI health. So it made me 374 damage in skull hits, plus I could match a skull after.
In one of the images, I could guarantee I’d be skull hit from sky fall more or less, and sure it did, but thankfully that troop just took magic damage at that point. It took me ages to force the AI to cast TMQ. At one point it had 2-3 4 gem to doomskull conversions, but I suppose I sacrified my TMQ to shift green away, when AI was full.
I was quite lucky, but think I earned it with all the death mark deaths! Got 2 in this fight myself.
1 Like
Primal Rift
no portions
hoard level 166 (people did it even with 100, but I didn’t want to make it too hard for myself)
kingdom level 10
3 Orpheus medals equipped
I did 12 attempts with Redthorn + Dark Dryad + 2xAlderfather, Riven Banner [6654,6652,6655,6655,3043]. Some times I got close, but I rarely came to the last battle with four troops alive and Treant as first.
Then I switched to Redthorn + 3xAlderfather, Riven Banner [6654,6655,6655,6655,3043]. It need more luck in the first battle, but then it seemed easier for me in the next battles, than with only 2 Alderfathers.
The first attempt, I came to the last battle with Treant + 2x Alderfather + Golem and got killed.
The second attempt, my Alderfather summoned Golem, I couldn’t get it killed fast enough to try for Treant and enemy slaughtered two of my Alderfather’s. Lost in the second battle.
The third attempt - I won:
The first battle. It’s all about luck to get your first troop killed fast, and to summon Treant, (if on the fist try it’ll summon Golem, you are very likely done for) and to end the battle with all troops alive and with Treant as first.
The second battle. Smuggler’s Den. Very easy, only Bonnie Rose does damage there and the Pirates never get the chance to increase attack because of the constant entangle
The third battle. Goblin Throneroom. Once again it’s luck to get enough attack in Treant to kill Queen Grapplepot before all your team end up dead. At the beginning I tried to not leave purple on the board to avoid Princess Fizzbang casting. As a ‘bonus’ that room gave all future enemies Agile, which made the last battle so much longer.
The boss battle. Entangle enemies with purple. Get attack for your Treant. Be lucky. I often left skulls on the board as a ‘bait’ for the enemy team, so the enemy spend its turn matching skulls with entangled Golem (avoid leaving doomskulls though, or Golem will entangle your Treant) instead of doing something more dangerous like getting mana for Redthorn. So I managed to kill Golem and Dryad, then Redhorn killed off my Treant with reflection (and meanwhile my Alderfathers were almost finished - 15, 40 and 68 life only left, it was a close call). Alderfather summoned Golem. And here I got incredibly lucky that Golem managed to skull down Redthorn before the battle was lost. And so I was left with Golem + 3 Alderfathers against enemy’s Alderfather. For a while it was really slow and boring: enemy’s Alderfather summoned a troop, I killed off the troop with my Golem while trying not to leave purple on the board for enemy’s Alderfather, did a little skull damage to enemy’s Alderfather but he summorned another troop, so repeat once again. I was hesitant to leave an enemy’s troop unentangled, my Alderfathers were one skull match away from dead, I was afraid to risk it. But finally I get a chance to let enemy kill my Golem, and I got lucky that my Alderfather summoned Treant. Then things speed up, Treant got enough attack, but it still took some time to win (Agile for enemy’s from the previous battle was a real pain). But in truth after Redthorn was killed, I could have relaxed some, with no damage-dealers as three Alderfathers entangle everything fast, it was just a drawn out fight but not dangerous.
8 Likes
I want to try your team now. My team dies around the 4th Cat Burglar cast, so I thought if I had Street Thief, Cat Burglar and 2 Kings I could survive better, but then I lose the 1st troop to skulls. And the one time I make it out to Cedric intact, he has my King kill everybody else…
Did you cast the tomb robber when full? Or just have it there to soak? Enemy Robber dodged skull hits 3 turns in a row too many times for my liking. But this current run has Cedric and Mimic rooms. I’m feeling lucky. And I have my best medals equipped. ![]()
Which Legendary rooms did you find easier? That Glacyon/Frost Lizard room wrecked me. Thank you.
Edit: Enemy Robber cast killed my first two troops. Next try, my Robber cast x2 to kill 1st two ai, but third cast backfired. 3rd try fail as well. Hoarding gems now. As is tradition.